After one year and 104 recipes, I finished the Brooks Bakes Bread Project on March 27, 2012. You can still find me baking and cooking at my new blog, Tangled Up In Food.

Sourdough Bread
March 27, 2012

by stacy
Published on: March 27, 2012
Tags:No Tags
Comments: No Comments

“Despite my own feeling that sourdough bread is much overrated and is difficult to perfect at home, I am including one recipe in this collection because interest in the subject is so tremendous…Certainly it is just as unpredictable as Salt-Rising Bread, and I am not sure it is worth the trouble.  I would much rather have you spend your time producing the Buttermilk White Bread or some of the rye breads.  But for those who like a challenge, here it is.”
-James Beard, Beard on Bread

Exactly one year ago, I started the Brooks Bakes Bread project.  Today, after a week-long process of creating a starter, I baked my final recipe: Sourdough Bread.  Thanks to Beard’s warnings, I put this one off until the very end.

Last Monday evening (March 19), I mixed milk, water, sugar, salt, and flour together to form a starter.  By Wednesday morning, the starter was bubbling and smelled noxious (Beard warns “if it really takes, it can drive you right out of the room” and he wasn’t kidding) and I mixed in yeast and more water.

Every morning, holding my breath, I’ve been stirring the starter.  According to Beard, “It will continue to smell to high heaven.”  Since our lease ends at the end of the month, our apartment was shown several times over the past week.  I feel a bit self-conscious about people’s impression of my housekeeping!

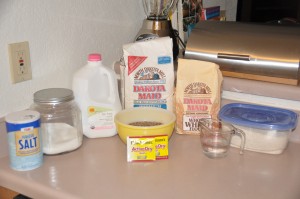
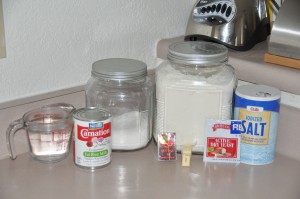
Last night, I created a sponge by combining one cup of starter with more water, sugar, salt, and flour.  After letting it rise for nearly a day, I finally began preparing my dough tonight.

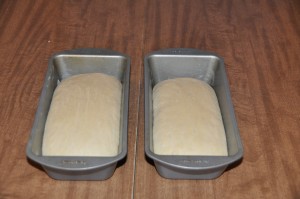
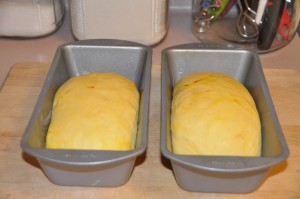
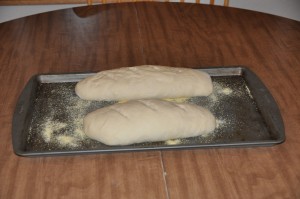
I mixed still more water, yeast, and flour into the sponge, and kneaded the dough with more flour until I made a firm dough.  After one and a half hours, I punched down the dough and then let it rise again for 45 minutes.  Then I shaped the dough into two French-style loaves and let it rise for a third time for another 45 minutes.

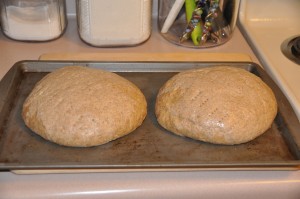
Sourdough Bread After Third Rising

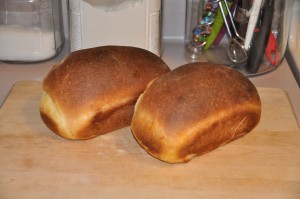
I baked the loaves at 400 degrees for 30 minutes, with a pan of boiling water on the lower rack of the oven.

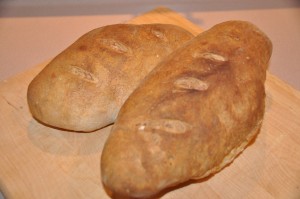
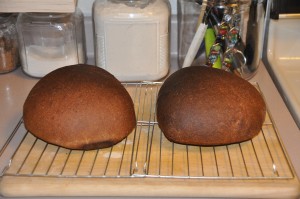
Sourdough Bread

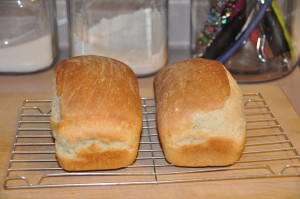
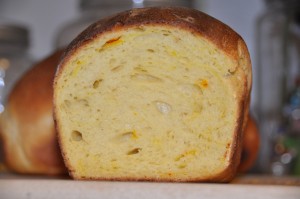
My loaf shaping skills still need a little work, but I ended up with two respectable loaves of Sourdough Bread.  My final recipe was a success: Sourdough Bread is surprisingly mild for how pungent the starter smelled, and the crust was amazing.

After a year of baking bread, I no longer would describe myself as a novice bread maker.  I’ve tried everything from doughnuts to flat bread topped with lamb, and developed my skills along the way.

What I love about bread (and what I suspect James Beard loved too) is that you can make a fairly decent loaf on your first try, but you can spend a lifetime perfecting it and trying infinite variations.  My bread baking will go on a hiatus for now, while I finish house renovations, settle into a new job, and eat down the impressive stash of bread in the freezer.  But I know that I will always come back to baking bread, however life unfolds.  In the words of James Beard, “There is no smell in the world of food to equal the perfume of baking bread and few greater pleasures in eating than sitting down with a slice of freshly baked bread, good butter, and a cup of tea or coffee.”

Thank you to everyone who has followed along and provided encouragement along the way.  And most of all, thanks to Mike for always believing in me and even more importantly, helping me eat all of that bread!

Salt-Rising Bread
March 26, 2012

by stacy
Published on: March 26, 2012
Tags:No Tags
Comments: No Comments

“You may try the same recipe [for Salt-Rising Bread] without success three or four times and find that it works the fifth time. Or you may get a loaf that is halfway good. If it works, fine; if it doesn’t, forget it. I am including it in this collection because it is a worthy recipe, but I do so with a warning that you may be disappointed.”
-James Beard, Beard on Bread

Because I am caught up in the stress-inducing situation that is home renovations while switching jobs, I am a week behind posting this. However, I have been working on my sourdough starter for the Brooks Bakes Bread Grand Finale tomorrow.

Salt-Rising Bread turned out to be one of my biggest failures of my Brooks Bakes Bread project. The idea behind salt rising bread is that you cultivate wild yeast to make your bread rise. However, yeast turns out to be wily for a one-celled organism. To sum it up briefly, because I am incredibly tired:

1) I made a starter using a potato, and let it sit in a warm water bath in my slow cooker for nearly 24 hours. The temperature was a steady 100 degrees.

2) Nevertheless, my starter failed to foam at all. Instead of giving up, I moved to Plan B:

Salt-Rising Bread After Rising

Plan B: Add yeast to your “yeast free” bread to ensure that it rises.

3) I ended up with a decent loaf of bread, although it wasn’t Salt-Rising Bread.  It had a nice even crumb and a slightly cheesy flavor from the starter.

Salt-Rising Bread

Mrs. Elizabeth Ovenstad’s Bread
March 22, 2012

by stacy
Published on: March 22, 2012
Tags:No Tags
Comments: No Comments

“I learned to bake this bread in Norway, at Mrs. Ovenstad’s farm near Oslo.  She bakes it twice a week…”
-James Beard, Beard on Bread

I put this recipe off until the end night because I couldn’t find any whole-wheat kernels locally.  I ended up substituting cracked wheat instead, which I soaked in boiling water for one hour per the recipe.

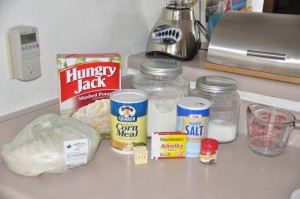
Ingredients:

Mrs. Elizabeth Ovenstad's Bread Ingredients

I mixed the dry ingredients together, and then I very carefully added the proofed yeast mixture, drained cracked wheat, water, and milk.  The dough was difficult to mix since my largest bowl was too small to comfortably accommodate nine cups of flour and various other ingredients, but I managed to make a decent dough.  After a thorough kneading, I let it rise for an hour.

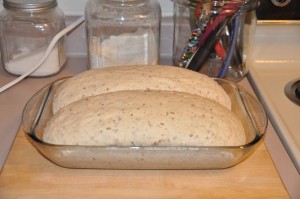
Next, I formed the dough into two loaves.  Since I didn’t have the 10 x 5 pans called for by the recipe, I shaped two long loaves and placed them in my 9 x 13 glass baking dish.  After about 45 minutes, they had doubled in size and were ready for baking.

Mrs. Elizabeth Ovenstad's Bread After Second Rising

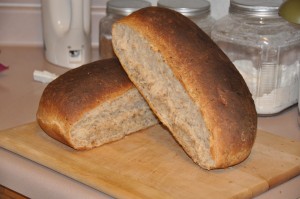
After one hour at 400 degrees, I had two delicious loaves with an incredible looking crust.

Mrs. Elizabeth Ovenstad's Bread

Mrs. Elizabeth Ovenstad’s Bread tasted just as incredible as it looked.  It has a light, even texture with a hearty flavor and an amazing crust.  Even Mike, who isn’t a big fan of whole-grain breads, couldn’t get enough of this.  Luckily, the loaves are huge.

Pumpernickel Bread I
March 21, 2012

by stacy
Published on: March 21, 2012
Tags:No Tags
Comments: No Comments

“This is an extremely interesting bread, but since it is practical to make only in large quantity, I recommend it solely to those of you who have large kitchens and large bowls.  Besides this, the dough is very sticky and takes a lot of deft working to get it to the baking stage.  So if you have any reservations about this challenge, I urge you to try another pumpernickel.”
-James Beard, Beard on Bread

Since I don’t have a large kitchen or a large bowl, and harbored some strong reservations, Pumpernickel Bread has been a recipe that I’ve put off until the bitter end.

Ingredients:

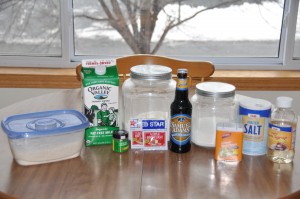
Pumpernickel Bread I Ingredients

I used prepared instant mashed potatoes.

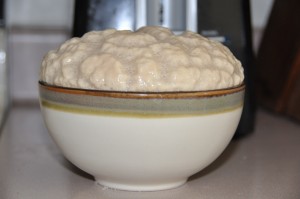
There is a lot of set up to this recipe.  You have to proof your yeast, make mashed potatoes, and prepare a cornmeal mush.  While I  was working on the potatoes and cornmeal, my yeast ended up looking like this:

Proofing Yeast

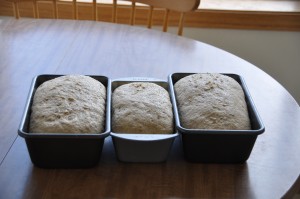
But I finally finished all of the beginning preparations, mixed in an ungodly amount of flour, and manhandled a huge mass of sticky dough into semi-submission.  I let the dough rise until it had exploded out of my not-large-enough bowl, and then formed it into three loaves.  This was difficult, because somehow my dough had reverted back to its sticky state while rising.  I ended up with one 8 x 4 loaf and two 9 x 5 loaves.

Pumpernickel Bread I After Second Rising

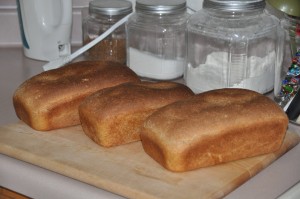
Once they had doubled in size, my loaves went into the oven at 425 degrees for 10 minutes and 350 degrees for 40 minutes.

Pumpernickel Bread I

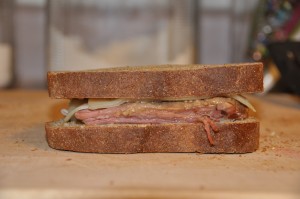
Pumpernickel Bread I is delicious–it is more of a rye bread than a pumpernickel, with only a hint of caraway.  Best of all, it made some very tasty Reuben sandwiches with leftover corn beef from St. Patrick’s Day.

Reuben Sandwich with Pumpernickel Bread I

Despite my reservations and small kitchen, I was up to the challenge.

Mother’s Raisin Bread
March 19, 2012

by stacy
Published on: March 19, 2012
Tags:No Tags
Comments: No Comments

“This was a raisin bread that my mother made very often, modeled on one she had admired at the Palace Hotel in San Francisco.  During World War I she used to do benefit teas for the British Red Cross, and there were always requests for this bread, thinly sliced and spread with good sweet butter.”
-James Beard, Beard on Bread

Over the course of this project, I researched James Beard and read many of his other books.  It is clear that his mother was a tremendous influence in his culinary life, and he very much admired her.  In her honor, I am making this raisin bread recipe as written (for the most part) because I felt it would rather sacrilegious to substitute dried cranberries.

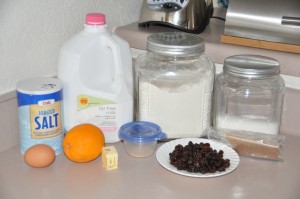
Here are the ingredients:

Mother's Raisin Bread Ingredients

Modifications: I halved the recipe, and I soaked the raisins in water, nutmeg, and orange peel for a few hours instead of in sherry, mace, and orange peel overnight.

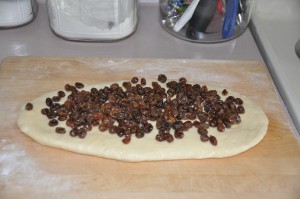
My dough mixed and kneaded up quite nicely, but the first rising took almost three hours.  When it had finally doubled in size, I punched it down, kneaded lightly, and let it rise for another 30 minutes.  Next, I rolled it into a rectangle and topped it with melted butter and the drained raisins.

Mother's Raisin Bread in Progress

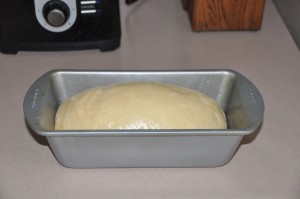
I rolled the dough up from the short side (after doing it backwards on my first attempt, ending up with a very long loaf that didn’t hold together) and placed it in my 8 x 4 loaf pan for another half hour of rising.

Mother's Raisin Bread After Second Rising

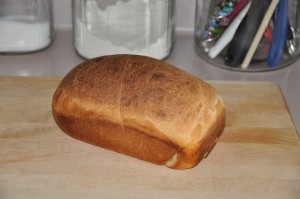
I baked the loaf at 400 degrees for 10 minutes, then at 350 degrees for 20 minutes.

Mother's Raisin Bread

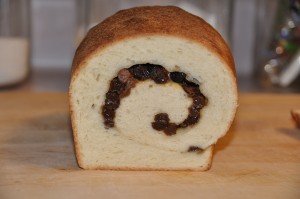
The verdict?  For a bread that involves raisins, this one isn’t bad.  It has a buttery, fluffy texture, and the hint of orange from the prepared raisins is a nice touch.  If you must make raisin bread, Mother’s Raisin Bread is a good one.

Mother's Raisin Bread


Plain Saffron Bread
March 19, 2012

by stacy
Published on: March 19, 2012
Tags:No Tags
Comments: 2 Comments

“This bread is reminiscent of Cornish and Welsh teas, where saffron buns and bread have been exceedingly popular for generations…It makes fine toast.”
-James Beard, Beard on Bread

“No offense to you or your cooking, but I think it tastes like water out of a garden hose.”
-Mike, who discovered he doesn’t like saffron

My life has taken on a hectic place.  We spent the first full week in March at Walt Disney World (bread notes: try the croissants in France and the sandwiches in Norway at the Epcot World Showcase).  Since coming back, I’ve gotten a new job, and we have started work on our new house.  So even though I baked Plain Saffron Bread last Tuesday, I’m just getting around to posting now.

Here are the ingredients:

Plain Saffron Bread Ingredients

Saffron is expensive–the little box of saffron threads from the bulk spice section was $10, and this recipe used most of it.

I started by steeping my saffron in boiling water.  Meanwhile, I proofed the yeast with sugar and warm water.  At the same time, I scalded the milk, adding the butter and salt.  Once the milk mixture had cooled, I combined everything in a large bowl and added the flour.  My dough kneaded up to be a yellow color with a softly elastic texture.

I let the dough rise twice before shaping into two loaves to fit my 8 x 4 loaf pans, and then I let those rise again.  Each rising took about 45 minutes.

Plain Saffron Bread After Second Rising

I baked the bread at 425 degrees for ten minutes and then finished it off at 350 for 20 minutes.

Plain Saffron Bread

You have to really like saffron to enjoy this bread.  Mike really didn’t think much of it (he compared it to drinking water out of a garden hose) and I wasn’t a huge fan of it fresh from the oven.  But sliced thin and toasted, Plain Saffron Bread is sublime.  The toasting makes the saffron flavor more subtle, and it crisps to the perfect texture.  It was definitely some of finest–and most expensive–toast that I’ve ever had.

Plain Saffron Bread

Verterkake
March 1, 2012

by stacy
Published on: March 1, 2012
Tags:No Tags
Comments: No Comments

“A very special Norwegian sweet bread baked in round loaves, verterkake takes its name from verterol, or brewer’s wort…dark beer can be substituted in its place.  The bread is densely textured and has a highly interesting, spicy flavor…”
-James Beard, Beard on Bread

Mike: It tastes…interesting.
Me: In a good way?
Mike: If you like the taste of potpourri.

Yesterday Mike and I closed on our first house.  How did I celebrate?  By baking bread (there was also a bottle of champagne).

Here are the ingredients (minus the raisins, of course):

Verterkake Ingredients

I started by mixing the milk, two cups of flour, and the yeast together to form a sponge.  I let that rise for 45 minutes, and then added the rest of ingredients.  It took an extra half cup of flour to form a firm enough dough, which I let rise for an hour.  Then, I lightly kneaded the dough with some more flour and formed two loaves.  After yet another hour of rising, the loaves were ready for the oven.

Verterkake After Second Rising

I baked the loaves at 375 degrees for 45 minutes.

Verterkake

I would characterize Vertekake as one of the few recipes that I have taken an active dislike to, solely because the mixture of cloves and pepper actually does taste like potpourri.  I don’t like potpourri as a scented decorative element, so I definitely don’t want to eat it.  This is not a bread that I would recommend, to put it mildly.


Kugelhopf
February 28, 2012

by stacy
Published on: February 28, 2012
Tags:No Tags
Comments: No Comments

“This is supposedly a recipe that Marie Antoinette took with her from Austria to France, where it became increasingly popular.  It is traditionally baked in a special Kugelhopf mold, which gives it a festive look.”
-James Beard, Beard on Bread

The recipe for Kugelhopf can be found on the James Beard Foundation’s website.  I substituted a similarly shaped Bundt pan for a Kugelhopf mold.  Of course, I left out the raisins.

Ingredients:

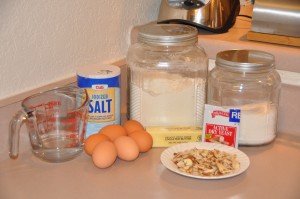
Kugelhopf Ingredients

While the yeast proofed with the sugar and water, I cut the stick of butter into two cups of flour with a pastry blender.  One by one, I added the eggs to the flour mixture and then alternately added the yeast mixture and the remaining flour.  Then I poured the dough into a buttered bowl and let it rise.

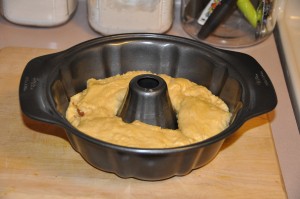
After an hour of rising, I stirred the dough down.  I placed half of the almonds in my buttered Bundt pan, spooned in half of the dough, sprinkled on the remainder of the almonds, and then finally poured in the rest of the dough.  Then I let the dough rise for another hour.

Kugelhopf After Second Rising

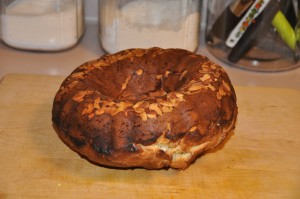
I baked the Kugelhopf at 475 degrees for 10 minutes, and then at 350 degrees for 35 minutes.

Kugelhopf

I would characterize Kugelhopf as an egg bread rather than a sweet bread–the egg flavor seemed far more pronounced that the sweetness, and it has a very rich, buttery texture.  I found this recipe to be very similar to Italian Holiday Bread, but with a pleasant crunch from the toasted almonds.

Crackling Biscuits
February 28, 2012

by stacy
Published on: February 28, 2012
Categories: Crackling Biscuits, Rolls
Tags:No Tags
Comments: No Comments

Since I live north of the Mason-Dixon Line, I couldn’t find any pork cracklings.  I also couldn’t find lard in a quantity less than five pounds, and Minnesota has blue laws that prohibit the sale of most alcohol on Sundays (such as the white wine the recipe calls for).  Also, I wanted to halve the recipe.

So here is my heavily modified version of Crackling Biscuits, without cracklings:

Bacon Biscuits
Inspired by “Crackling Biscuits” from Beard on Bread, by James Beard

Crackling Biscuits

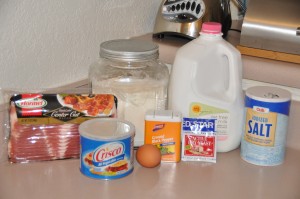
Ingredients:

1/2 package active dry yeast
1 1/2 tablespoons warm milk
1 3/4 cup plus 1/2 tablespoon all-purpose flour
1 egg, separated
4 slices of bacon, fried until crispy and finely chopped
1/2 tablespoon salt
1/2 teaspoon of pepper (this yields a very peppery biscuit, use less if you prefer)
1/4 cup vegetable shortening, melted
1/4 cup plus 1 teaspoon warm water

Dissolve the yeast and 1/2 tablespoon flour in warm milk and let proof.  Combine 1 3/4 cup flour, the egg white, bacon, salt, pepper, shortening, and 1/4 cup water.  Add yeast mixture and stir, adding more water if needed to form a stiff dough.  Knead on a floured surface until smooth.  Place dough in a buttered bowl and let rise for about one hour, or until doubled in bulk.

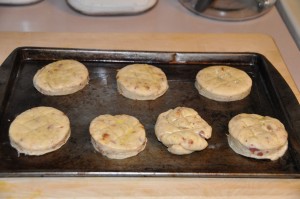
Punch the dough down and let rest for three minutes.  Roll the dough out, fold in half, cover with a cloth, and let it rest for 10 minutes.  Repeat the rolling, folding, and resting process three more times (four total).  Roll dough out to a thickness of 1/2 inch and cut out biscuits with round cutter.  Place biscuits on a buttered baking sheet.  Beat the egg yolk with 1 teaspoon of water.  Score the biscuits in a lattice pattern and brush with the egg wash.

Crackling Biscuits Before Baking

When the egg wash has dried, bake the biscuits in a preheated 400 degree oven for 20 minutes or until lightly browned.

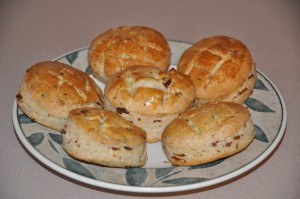
Crackling Biscuits

I found my biscuits to be edible, but not much to write home about.  The texture was light and flaky, but the bacon bits and tons of pepper just didn’t do it for me.  Maybe they would have been better with cracklings and white wine.

Swedish Limpa
February 25, 2012

by stacy
Published on: February 25, 2012
Tags:No Tags
Comments: 1 Comment

q7j373d0d3

page 1 of 11

104


0

Loaves baked   Loaves to go
About the Baker
I'm a paralegal living and working in the Minneapolis-St. Paul metro area. Besides baking, blogging, and eating bread, I love knitting and enjoying the Minnesota outdoors. My husband, Mike, is the Brooks Bakes Bread website developer, bread photographer, and chief taste tester.
October 2023
S M T W T F S
« Mar    
1234567
891011121314
15161718192021
22232425262728
293031  
Recent Comments

Welcome , October 14, 2023