After one year and 104 recipes, I finished the Brooks Bakes Bread Project on March 27, 2012. You can still find me baking and cooking at my new blog, Tangled Up In Food.

Archives: June 2011

Finnish Sour Rye Bread
June 26, 2011

by stacy
Published on: June 26, 2011
Tags:No Tags
Comments: No Comments

“I find this fine-grained, well-flavored rye bread a pleasant change from other breads in its category.”
-James Beard, Beard on Bread

Several of the recipes in Beard on Bread use rye flour.  It took me awhile to find a good source for reasonably-priced rye flour (I found it in bulk at the Linden Hills Co-op), and then I had to contend with Mike’s attitude.

“There are HOW many rye bread recipes?  But I don’t like rye bread!”

To pacify him, I let him pick the first rye bread recipe I tried.  He settled on Finnish Sour Rye Bread, which also gave me a chance to commune with my Finnish heritage.

I started the bread on Wednesday night, when I mixed one cup of rye flour with one cup of water to make a starter.  Over the next four days, I stirred the starter once a day.  At first it got bubbly, but then it went flat.  I was concerned that I had somehow killed it, but the noxious, fermenting smell assuaged my fears.

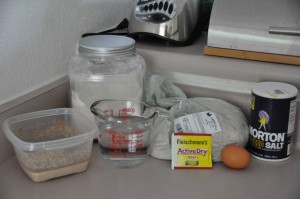
This afternoon, I mixed the starter (pictured in the clear plastic container) with the rest of the ingredients.  The rye flour is in the plastic bag on the right.

Finnish Sour Rye Bread Ingredients

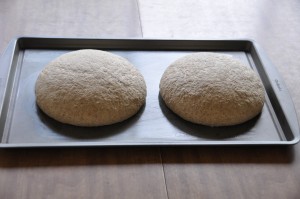
Finnish Sour Rye Bread is only half rye flour; there is an equal amount of all-purpose flour.  However, the rye flour made the dough much softer than a typical white bread.  I let the dough rise for 1 1/2 hours while I sat on the deck, enjoying the summer weather with the New York Times and a blended coffee drink.  Then I shaped the dough into two round loaves, taking care to shape them tightly to avoid the problems I faced with my Irish Whole-Wheat Soda Bread that burst apart.  After rising for 40 minutes, the loaves were ready to go into the oven.

Finnish Sour Rye Bread After Second Rising

Mindful of my under-baked soda bread, I baked the loaves for the entire recommended baking time of 45 minutes.  At that point, I removed them from the oven and thumped the bottom to check for doneness.  The loaves sounded done, so I let them cool while I finished cooking some soup.

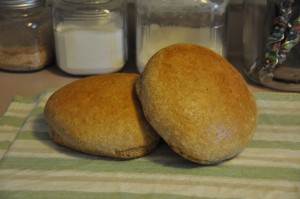
Finnish Sour Rye Bread

At this point, Mike had been lured downstairs by the aroma of fresh bread.  “That smells really good,” he commented, apparently forgetting that he didn’t like rye bread.  I cut off a few slices.  Mike took a bite and chewed thoughtfully.  Then he turned, looked me in the eye, and said, “Congratulations on an excellent loaf of bread.”

And it was an excellent loaf of bread–there was only the slightest bit of tang, despite how pungent the starter was after fermenting for four days.  The rye flavor was balanced by the white flour, resulting in a perfect texture and taste.  Finnish Sour Rye Bread is a delicious bread–even for those who don’t like rye bread.

Crumpets
June 26, 2011

by stacy
Published on: June 26, 2011
Categories: Crumpets, Griddle Breads
Tags:No Tags
Comments: No Comments

“Crumpets bear a close similarity to English muffins and to English muffin bread.  Rather soggy and holey, they must be toasted and treated to quantities of butter and good homemade jam.”
-James Beard, Beard on Bread

Last night I made my last recipe from the “Griddle Breads” section of Beard on Bread: Crumpets.  To make crumpets, you mix up a thick batter and cook it in metal rings on a hot griddle.  If you’re frugal (like me), you may want to try a test batch of crumpets before you invest in a set of crumpet rings.  In that case, Beard recommends using empty tuna cans with the tops and bottoms removed.  I do not recommend using empty tuna cans, because your crumpets will become adhered the the cans, you will make a mess trying to get them out, and then you will be reduced to cooking an entire batch of crumpets using one small round cookie cutter.

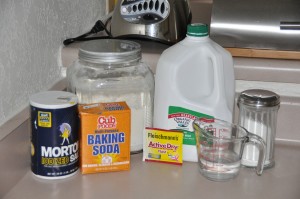
Anyway, back to the beginning.  Here are the ingredients:

Crumpets Ingredients

Even though no kneading is required, the batter does need to rise twice.  I made the crumpets last night, so they would be ready for breakfast this morning.

The batter mixed up nicely, and I poured the batter into my two tuna can rings.  Everything seemed to be going well until I tried to remove the tuna can and flip over the crumpet to cook the other side.  I tried gently lifting up the can–the crumpet didn’t budge.  I tried loosening the edges with a knife–the crumpet refused to dislodge.  Finally, I held the can upside and shook it, spraying batter across my kitchen, but at least finally separating the crumpet from the tuna can.  Then, I got to repeat the process with Crumpet #2.

Needless to say, I wasn’t looking forward to a night of fighting with tuna cans and crumpet batter.  The only other round, ring-like object I have is a small round cookie cutter that I use for making biscuits.  It worked wonderfully as an impromptu crumpet ring–the only problem is that it takes a long time (about 45 minutes) to make a batch of crumpets when you can only make one at a time.  I tried using my pumpkin-shaped cookie cutter, but I couldn’t get the crumpet out because batter got stuck in the pumpkin stem.

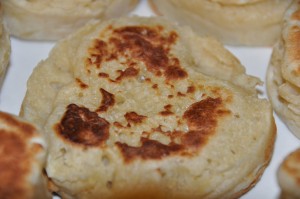
It took much longer that it needed to, but I managed to make a nice-looking batch of crumpets.

Crumpets

Mike and I ate our crumpets for breakfast this morning, toasted and with my mother’s delicious homemade strawberry jam.  Crumpets are somewhat like English muffins, only better: they are light and spongy, with a delicate texture.  For anyone who is curious, here is a nice blog post outlining the difference between crumpets and English muffins.

Crumpet Close Up

Since the crumpets were such a success, I bought a set of 4 crumpet rings.  If you want to try crumpets, I recommend that you do the same–I haven’t tried the rings out yet, but they have to be better than a pumpkin cookie cutter.


Irish Whole-Wheat Soda Bread
June 25, 2011

by stacy
Published on: June 25, 2011
Tags:No Tags
Comments: No Comments

“Soda bread is very different from any other bread you can find in the world.  It’s round, with a cross cut in the top, and it has a velvety texture, quite unlike yeast bread, and the most distinctive and delicious taste.”
-James Beard, Beard on Bread

Since I’ve been enjoying the first few official days of summer, I’m a few days late posting about the Irish Whole-Wheat Soda Bread that I made on Thursday.  The recipe appears deceptively simple–basic ingredients, a short kneading time, and no rising.  However, there is technique to soda bread that I didn’t quite master on my first loaf.

The recipe can be found on the James Beard Foundation’s website.

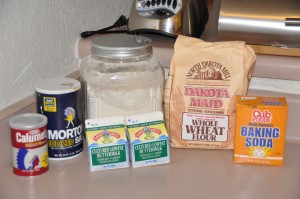
Here are the ingredients:

Irish Whole-Wheat Soda Bread Ingredients

All I had to do was mix the ingredients together.  My dough was a bit crumbly, but I got it to hold together after kneading it for a few minutes.  In hindsight, I should have kneaded it for a longer period of time to get a smoother texture.

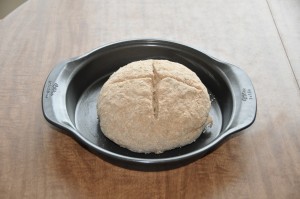
Next, I shaped the dough into a round loaf and cut a cross in the top.  At this stage, I should have (1) put more time and effort into shaping the dough into a tighter ball; and (2) cut with consistent pressure, instead of letting the knife go in more deeply at the end of each cut.  Unaware of the problems ahead, I put the loaf in the oven.

Irish Whole-Wheat Soda Bread Before Baking

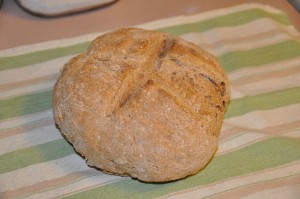
After 25 minutes, I pulled the loaf out of the oven to discover that because I cut too deeply, one quarter of the loaf had separated and was falling off.  I also had no idea of how to determine if the loaf was done or not.  I tried thumping in on the bottom.  The loaf sounded hollow, but I just wasn’t sure.  In desperation, I sliced into the bread (even though Beard cautions, “Let the loaf cool before slicing very thin; soda bread must never be cut thick”).  It was a good thing that I did, because the center of the loaf was a mass of uncooked dough.  I let the bread bake for another 10 minutes, and then used the sophisticated technique of ripping off part of the loaf to look at the middle to determine whether or not my loaf was done.  It appeared to be fully baked, so I cut myself another slice.  A thick one.

Irish Whole-Wheat Soda Bread

Over the past few days, I have been eating a lot of Irish Whole-Wheat Soda Bread, mostly because I have the whole loaf to myself after Mike tried a slice and pronounced it disgusting.  I, on the other had, absolutely love the taste of soda bread.  The texture of my loaf leaves something to be desired–it’s not as smooth as I would like, and instead of being nicely rounded, my loaf looks more like a glob.  This is definitely a recipe that I will have to bake again to perfect.  And then I will eat an entire loaf of delicious soda bread myself–cut into glorious thick slices.

Anadama Bread
June 18, 2011

by stacy
Published on: June 18, 2011
Tags:No Tags
Comments: No Comments

“There are many recipes for this famous American loaf.  No two people agree on what the original was, but it is practically certain that it contained cornmeal and molasses.”
-James Beard, Beard on Bread

I have never heard of Anadama Bread, despite its alleged status as a “famous American loaf.”  I checked the Wikipedia article, and apparently it is an old New England recipe; however, my Maine-raised husband hadn’t heard of it either.  According to legend, there was a woman named Anna who cooked nothing but cornmeal mush with molasses for her husband.  One day, he added yeast and flour to his porridge and baked it, cursing “Anna, damn her!” as he ate the bread.  My thought is that if Anna’s husband could bake bread, he should have spent more time doing that and less time complaining about his wife’s cooking.
Whether or not it’s famous, Anadama Bread was a welcome change from Apricot Bread. Mike ended up taking most of that to work yesterday.  He reported that it was completely gone by noon.  Apparently there are lots of people who do not share my white-hot hatred for apricots.

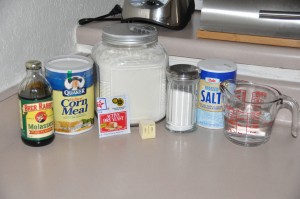
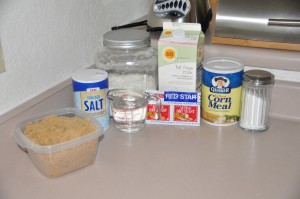
Here are the ingredients, including the signature ingredients of cornmeal and molasses:

Anadama Bread Ingredients

Mindful of the near-disaster that resulted when I didn’t add enough flour to my Cornmeal Bread, I erred on the side of caution and accidentally added too much flour.  I was able to get my dough to the right consistency by kneading in a half teaspoon of water.  The dough seemed much tougher than previous doughs I’ve worked with, possibly due to the cornmeal.

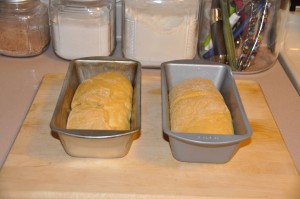
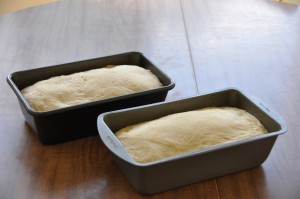
I let the dough rise for 1 hour and 45 minutes and then formed it into loaves in 8 x 4 pans.  Then, I let the loaves rise for an hour.

Anadama Bread After Second Rising

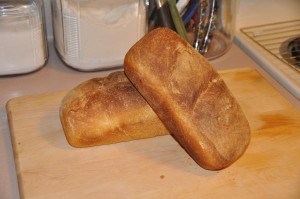
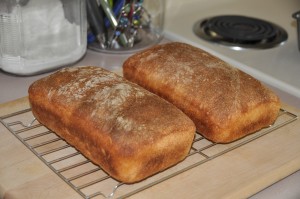
After baking the loaves at 425 degrees for 10 minutes, I turned the oven down to 350 degrees and baked them for 20 minutes.  I always use the “thump test” to check for doneness: I tap the top of the loaf with a table knife, and if if sounds hollow, I turn the bread out of the pan and tap the bottom.  If that sounds hollow as well, the bread is done.

Anadama Bread

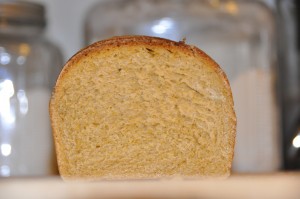
Anadama Bread was infinitely better than Apricot Bread.  It is a slightly salty, finely textured bread, with a rich, savory flavor from the molasses.  Mike referred to it as “a manly bread” because he thought it was especially hearty.  I feel fortunate to have a husband who is so appreciative of all of my baking efforts–unlike poor Anna!

Anadama Bread

Apricot Bread
June 15, 2011

by stacy
Published on: June 15, 2011
Tags:No Tags
Comments: No Comments

“Like all of the fruit breads made with baking powder, the apricot loaves are quite rich and have beautiful color and rather tight texture.”
-James Beard, Beard on Bread

Even though it’s an easy recipe, I have been hesitant to bake Apricot Bread.  I tried apricots once before, and I disliked them so much that I threw away most of the bag.  However, since I’m baking all 104 recipes, I had to conquer my disdain and give Apricot Bread a try.

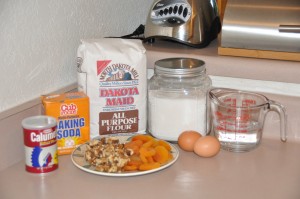
Here are the ingredients:

Apricot Bread Ingredients

The recipe calls for “1 cup chopped nuts” but doesn’t specify what kind to use.  I used walnuts.  Preparing the dough was easy–I just had to soak the apricots in boiling water for a few minutes, chop up the apricots and walnuts, and then mix all of the ingredients together.

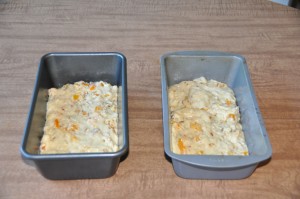
Next, I divided the dough in half and scraped it into two 9 x 5 loaf pans as Beard instructs.  They did seem a bit under-filled, but I decided to follow the recipe and see what happened.

Apricot Bread Before Baking

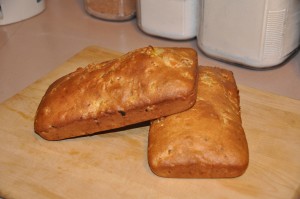
The bread was finished after 25 minutes in the oven at 350 degrees.  I put the loaves on racks to cool, suspiciously eying the apricot chunks.  One of the loaves was rather flat, but the other rose nicely.

Apricot Bread

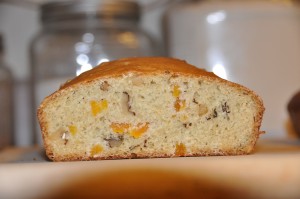
After letting the bread cool, I sampled a slice and was pleasantly surprised.  The sugar and walnuts almost cancel out the apricot flavor.  The texture is very similar to Raw Apple Bread, one of my favorite Beard on Bread recipes.  If you like apricots, I’m sure that you would enjoy the Apricot Bread recipe; if not, stick with Raw Apple Bread instead.

Apricot Bread

Cornmeal Bread
June 11, 2011

by stacy
Published on: June 11, 2011
Tags:No Tags
Comments: No Comments

“[Cornmeal Bread] makes a beautiful, well-risen loaf that should be thoroughly cooled before slicing.  Don’t let the smell of it tempt you into cutting a big chunk off while it is still hot.”
-James Beard, Beard on Bread

I happened to wake up early this morning, so I decided to bake some bread.  I settled on Cornmeal Bread because I had all the ingredients on hand (only having two eggs was a limiting factor).
Here are the ingredients:

Cornmeal Bread Ingredients

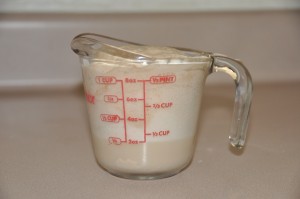
The first step was to make some cornmeal mush with a cup of boiling water, a half cup of cornmeal, and some salt.  Then I added the yeast and sugar to a half cup of water and let it proof.  I don’t think I’ve ever had yeast proof so quickly–this is what it looked like after 2 minutes:

Yeast Proofing

I started with only a half cup of water!

Everything was going smoothly as I combined all the ingredients and started adding the flour to the mixture, one cup at a time.  At this point, I should make it clear that I am not a true morning person.  I wake up early, but my heart just isn’t in it.  Apparently, this means that my alertness level is somewhat lacking, because when I turned the dough onto my floured surface to begin kneading, I realized the “dough” was in reality the consistency of mud.  There was no way to knead more flour into it–there was dough covering to my hands, stuck to the cutting board, still adhered to the bowl.  I looked at the mess, briefly considered yelling loud enough to wake up Mike and have him help me scrape the dough off my hands, and then realized that the habit of kneading my dough on a cutting board instead of the counter was going to save the day.  I tilted the cutting board over the bowl, and with the help of gravity and a knife, scraped all the dough back into the bowl.  I somehow managed to turn on the faucet with my elbow, and washed the inch-thick layer of dough off my hands.  Then I mixed in about a cup more flour, and finally had some bread dough I could actually work with.  I still had to knead at least half a cup of flour into the dough to prevent it from sticking to the cutting board.

The moral of the story: always knead your dough on a cutting board instead of directly on the counter.  If I had dumped that mess onto the kitchen counter, I would probably still be scraping it off.

The rest of my baking experience was non-eventful.  I let the dough rise for about 45 minutes, formed it into loaves, and then let the loaves rise for about an hour.

Cornmeal Bread After Second Rising

Next, the loaves went into the oven for 10 minutes at 425 degrees, then 10 minutes at 350 degrees.  Finally, I took the loaves out of the pans and baked them on the oven rack for 3 minutes to crisp the bottom of the loaves.

Cornmeal Bread

As Beard insists, we waited until the bread was cool before sampling it.  I loved it–the bread had a spongy, soft texture and the taste was a perfect balance of sweet and salty.  This is definitely a recipe I will make again; however, I have learned my lesson and will add more flour to the dough next time!

Cornmeal Bread

Lemon Bread
June 8, 2011

by stacy
Published on: June 8, 2011
Tags:No Tags
Comments: No Comments

“[Lemon Bread] is a tart, deliciously refreshing bread with a character all its own.”
-James Beard, Beard on Bread

It was over 100 degrees yesterday–definitely not typical June weather in Minneapolis.  Since Mike and I are lucky enough to have central air conditioning, I didn’t let the heat wave interfere with my plans to bake Lemon Bread.

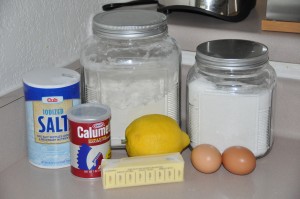
Here are the ingredients:

Lemon Bread Ingredients

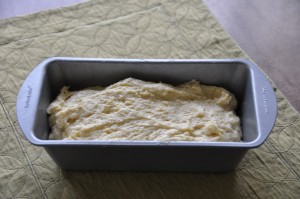
I wasn’t sure how much lemon juice my lemon would yield–the recipe calls for 1/2 cup.  I only got about 1/4 cup of fresh squeezed lemon juice, so I had to use lemon juice from concentrate for the rest.  The batter was very light and fluffy, like the consistency of a thick butter cream frosting.

Lemon Bread Before Baking

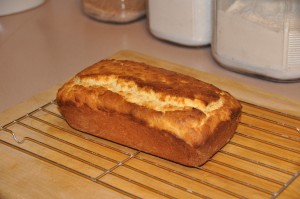
I greased my loaf pan heavily with butter and then floured it, per Beard’s instructions.  The loaf was done after 40 minutes in the oven at 350 degrees.  I let it cool for 10 minutes, and then turned the pan upside down.  Like magic, the bread slid right out.

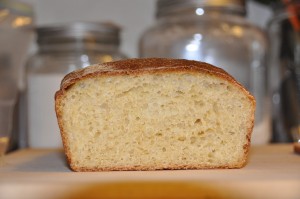
Lemon Bread

We had Lemon Bread for breakfast this morning.  Mike thought that the lemon flavor was incredible; he liked it so much that he ate his slices plain.  I thought that the lemon flavor was nice, especially when paired with homemade strawberry jam.  However, the bread craved moisture–it was so dry and crumbly that some of the slices fell apart.  Luckily, since this is one of Mike’s favorite breads, he will happily finish the rest of the loaf.  Sometimes we just complement each other so nicely.

Basic Home-Style Bread
June 5, 2011

by stacy
Published on: June 5, 2011
Tags:No Tags
Comments: No Comments

“To most people homemade bread means a slightly sweet loaf made with milk and some shortening, quite light and rather fine in texture and much enjoyed when fresh with a generous spreading of butter and preserves.”
-James Beard, Beard on Bread

Today I wanted to bake a nice, basic loaf of bread to make sandwiches with over the upcoming week.  I chose Basic Home-Style Bread, which is very similar to Beard’s Basic White Bread.  The major differences are that Home-Style Bread calls for milk instead of water, and there is half a stick of melted butter.  The recipe can be found on the James Beard’s Foundation website.

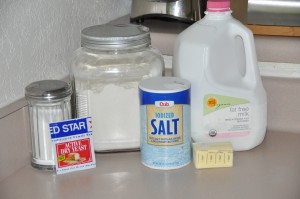
Here are the ingredients:

Basic Home-Style Bread Ingredients

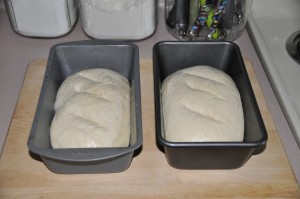
Although it did take a few hours due to two risings, this was a straight-forward recipe to make.  I mixed all the ingredients together, kneaded the dough, let it rise for an hour, kneaded it again and shaped it into loaves, and let the loaves rise for 45 minutes.  Instead of brushing the loaves with an egg white, I used water.

Basic Home-Style Bread After Second Rising

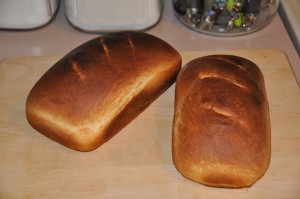
Finally, I baked the loaves at 400 degrees for 28 minutes.

Basic Home-Style Bread

Mike and I were able to enjoy the bread fresh out of the oven for supper.  I thought it was wonderful–the milk and butter made this bread more flavorful and finely textured compared to Basic White Bread.  However, Mike liked the Basic White Bread better because it had more salt.  Regardless, most of one loaf disappeared tonight, and we are looking forward to some delicious sandwiches this week.


Banana Nut Bread
June 4, 2011

by stacy
Published on: June 4, 2011
Tags:No Tags
Comments: No Comments

“[Banana Nut Bread] is extraordinarily good for small sandwiches or as a breakfast or luncheon bread…”
-James Beard, Beard on Bread

This week, I was in the mood for banana bread.  Since I wanted the bananas to mash easily, I let them ripen on my counter for nearly a week.  Last night I realized it was time to make bread when they started falling apart when I moved them across the counter.

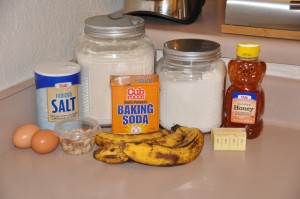
In addition to the over-ripe bananas, here are the rest of the ingredients:

Banana Nut Bread Ingredients

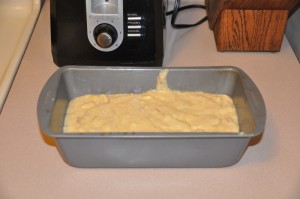
This was an easy recipe to put together: all I had to do was mix the ingredients together and pour into a loaf pan.  Beard’s recipe calls for using a 12 x 4 1/2 loaf pan; I don’t have a pan that size, so I just used a 9 x 5 instead.

Banana Nut Bread Before Baking

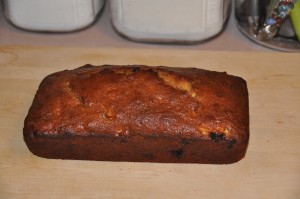
The bread was finished after baking at 350 degrees for 50 minutes.  It was a bit tricky to get the bread out of the pan, even though I greased the pan thoroughly.  I loosened the edges of the bread with a knife, and then turned the pan upside down–the loaf didn’t budge.  I tried loosening the edges some more, and the bread stubbornly remained in the pan.  In exasperation, I went upstairs to do a Google search for “how to get bread out of a loaf pan” and was starting to come to the conclusion that we were going to have to dig the bread out bite-by-bite with forks when Mike saved the day.  Apparently he held the pan upside down, wiggled it like a ice cube tray, and the bread popped right out.  Although I think I should get credit for loosening it…

Banana Nut Bread

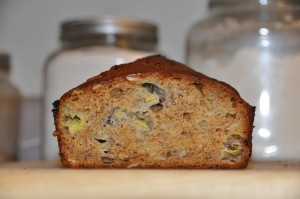
We had a delicious breakfast of Banana Nut Bread this morning.  I like this recipe much better than Beard’s other recipe for banana bread.  Since it has an extra banana (three instead of two), Banana Nut Bread is much more flavorful and moist.  I also enjoyed the flavor combination of almonds and bananas.

Of course, this wasn’t as good as my mother’s fabulous banana bread (but I doubt any recipe will ever be) but it was close.

Banana Nut Bread

page 1 of 1

104


0

Loaves baked   Loaves to go
About the Baker
I'm a paralegal living and working in the Minneapolis-St. Paul metro area. Besides baking, blogging, and eating bread, I love knitting and enjoying the Minnesota outdoors. My husband, Mike, is the Brooks Bakes Bread website developer, bread photographer, and chief taste tester.
June 2011
S M T W T F S
« May   Jul »
 1234
567891011
12131415161718
19202122232425
2627282930  
Recent Comments

Welcome , October 14, 2023